Getting Started with Foxpit
Set up your multi-agent coding cockpit in less than five minutes. Foxpit runs Claude Code, Codex, OpenCode and Antigravity as one team, with real terminals, optional Git worktrees and a live 3D office.
1. What you need
- Operating system: Windows 10 or 11 (x64), macOS on Apple Silicon (M1 or newer), or 64-bit Linux (AppImage).
- A free Foxpit account: sign in with an email code, Google or GitHub. The 3-day trial starts right away, no card needed.
- At least one agent: Claude Code, OpenAI Codex CLI, OpenCode or Antigravity, signed in with your own account. On Windows you can also start with the built-in Foxpit engine and an API key from any provider.
- Git: needed if you want agents to work in separate worktrees.
- Node.js: not required. Foxpit brings its own runtime for its hooks and bridge.
2. Installation
Grab the latest pre-built package for your operating system from the releases page:
Download Foxpit v0.1.11
The download starts right away:
The installer isn't code-signed yet. On Windows, if SmartScreen appears, choose More info → Run anyway. On macOS, right-click Foxpit and choose Open the first time. On Linux, make the AppImage executable (chmod +x Foxpit-*.AppImage) and run it.
3. First run: sign in and build your team
The first time you open Foxpit, a short setup walks you through five steps:
- Sign in. Enter your email and type the 8-digit code we send you, or continue with Google or GitHub. Your trial starts.
- Agents. Foxpit finds Claude Code, Codex, OpenCode and Antigravity on your computer. Connect all adds small hooks so each agent can report what it's doing. An agent that's installed but not signed in gets a Not signed in badge; one that's missing has an install command you can copy.
- Lead. Choose the agent and model for Fox, your lead. Give it your strongest model: it plans the work and hands out the pieces.
- Project. Pick Use an existing folder for code you already have, or Start a new empty folder. Foxpit shows the exact path before it creates anything.
- Team. Tick the mascots you want, give each a specialty and choose its agent and model. Foxpit looks at your folder and suggests a team; it's only applied when you press Use suggestion. Running helpers on a cheaper model saves your lead's quota.
When setup is done, the office opens with a Your first task card: send it to Fox and watch the team split the work.
Your code stays on your computer. The hooks talk to Foxpit over 127.0.0.1 only. Foxpit has no telemetry and never uploads your code. The agents you run still talk to their own model providers, under your own accounts. You can remove the hooks with one click from the Agents panel.
4. Working with your team
- Talk to Fox. Type your task in Fox's terminal or chat. Fox plans it and sends each part to the teammate whose specialty fits.
- See what came back. When a teammate finishes, a delivery card shows the files it changed, the test results and what it cost. All past deliveries are in the Deliveries tab.
- Add an agent. Use + Add agent in the team panel. Tick Work on a separate branch to give it its own Git worktree, so parallel agents never collide on uncommitted files.
- Change the team. Open Manage Team to change roles, agents and models, or press Suggest a team for a fresh suggestion.
- Watch your quota. The Usage panel in the top bar shows each agent's remaining quota and when it resets.
- More projects. + New project asks for the folder and the lead, and keeps a separate team and history for each project.
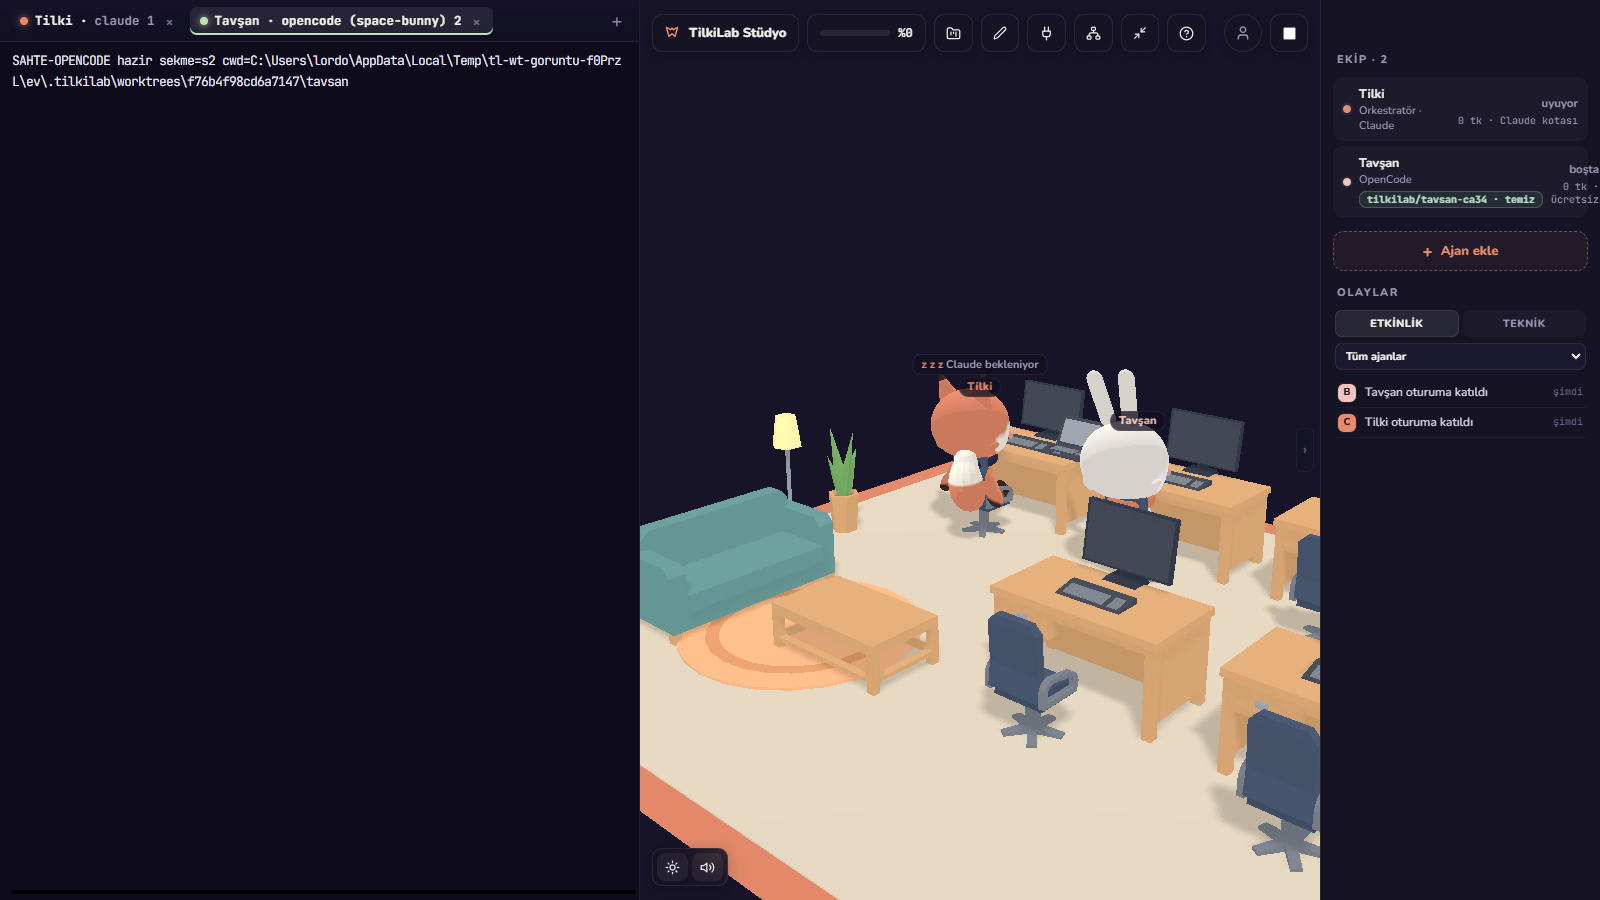
5. Monitoring Agent States at a Glance
In the 3D office view, every agent sits at a desk represented by a mascot. Their visual status reflects what is happening inside the real terminal:
- Thinking / Running: The mascot types at the keyboard, indicating active LLM processing or command execution.
- Waiting for Approval: A bright alert flag appears above the desk, and your OS taskbar flashes. Click the agent's status bubble or the summary bar to jump straight to its terminal and approve.
- Idle / Done: The agent has completed its task and is awaiting further instructions.
- Stuck / Error: Red warning indicator signals a crashed command or API rate limit.
Next Steps
Now that your cockpit is up and running, explore advanced orchestration patterns:
- Run Multiple Claude Code Agents in Parallel — Prevent race conditions across parallel sessions.
- Save Claude Quota with Orchestration — Delegate tasks to lighter models to protect token limits.
- Git Worktrees for AI Agents — Deep dive into branch isolation strategies.
- Foxpit FAQ — Common troubleshooting questions answered.